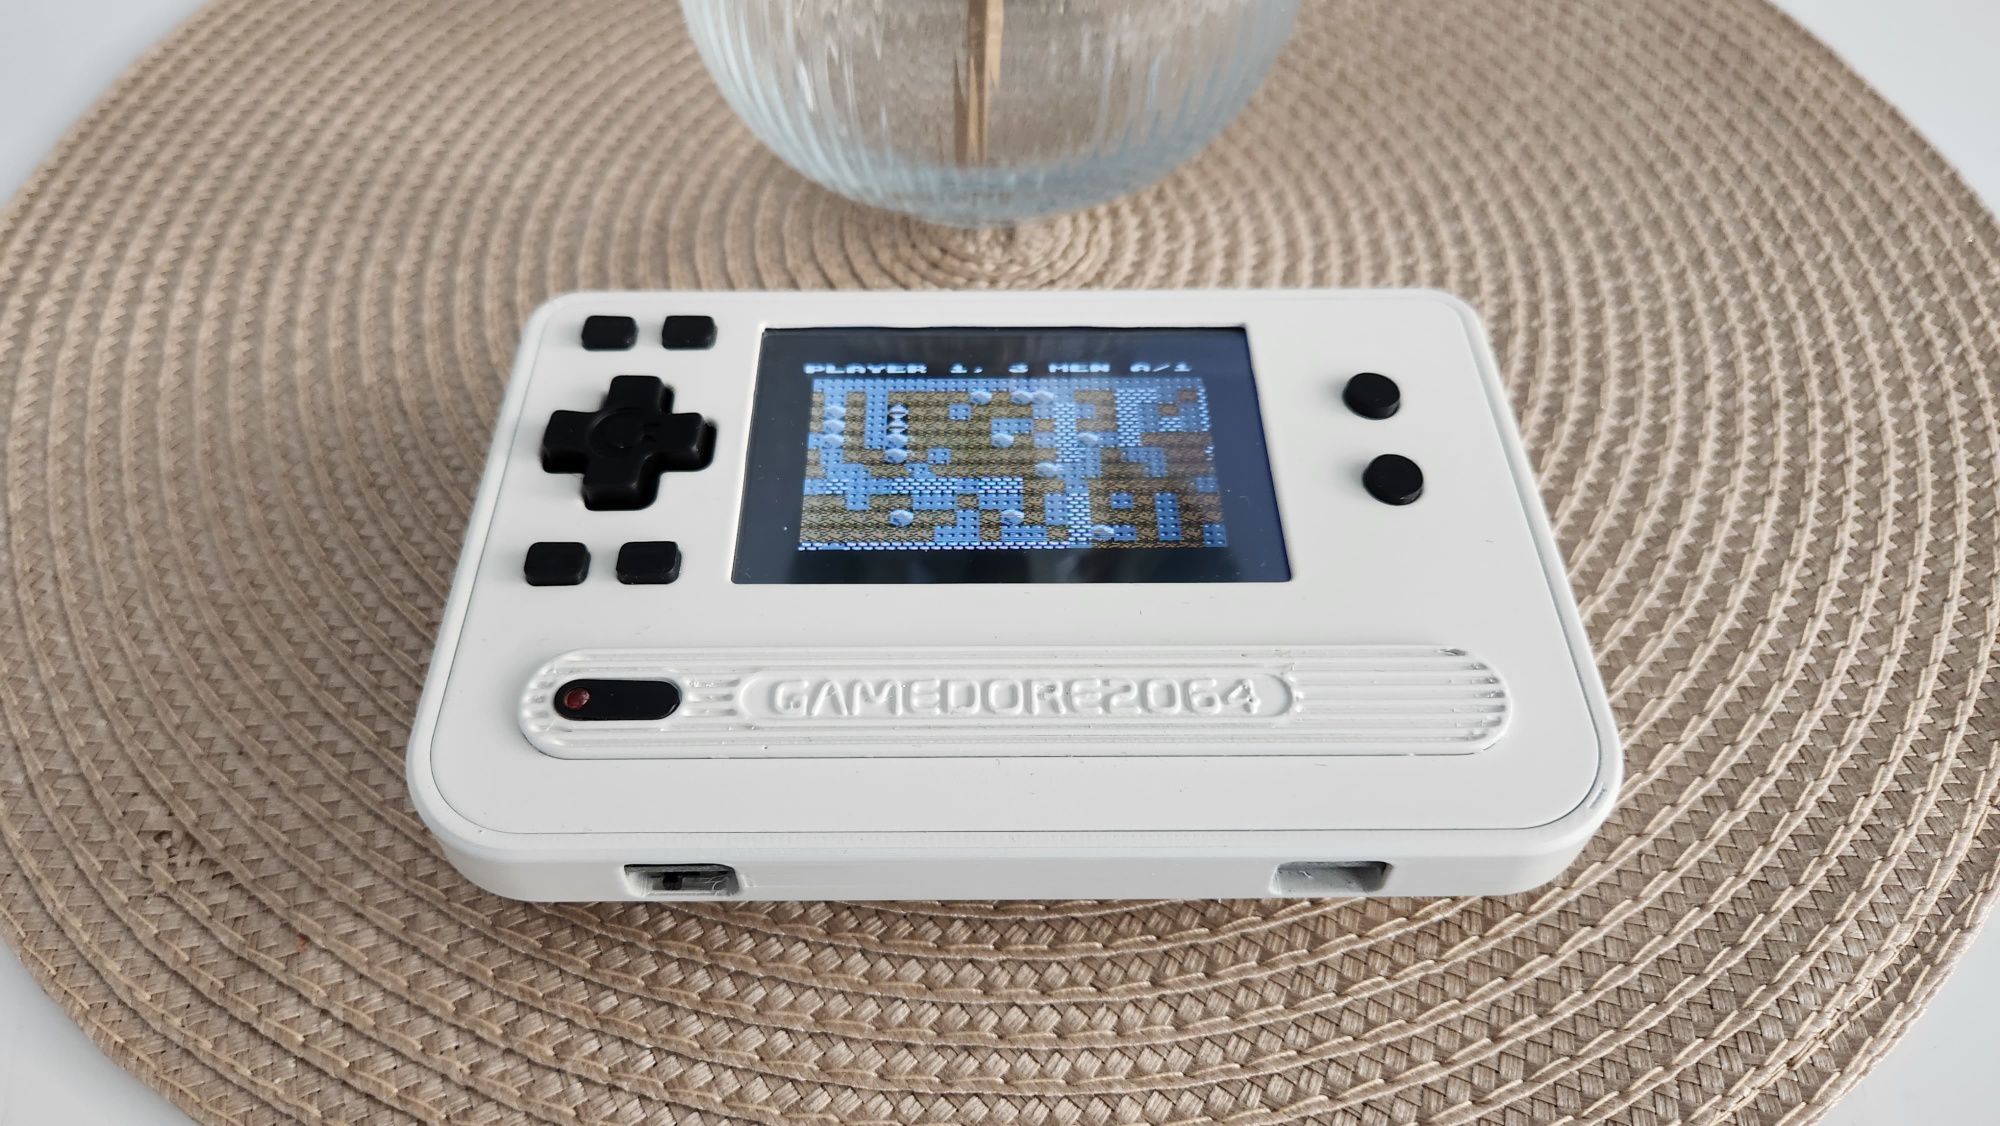
Handheld from 80s that we never had - Gamedore 2064
Created 3D printable gaming retro handheld to play C64 games on the go. The game console that we never had.

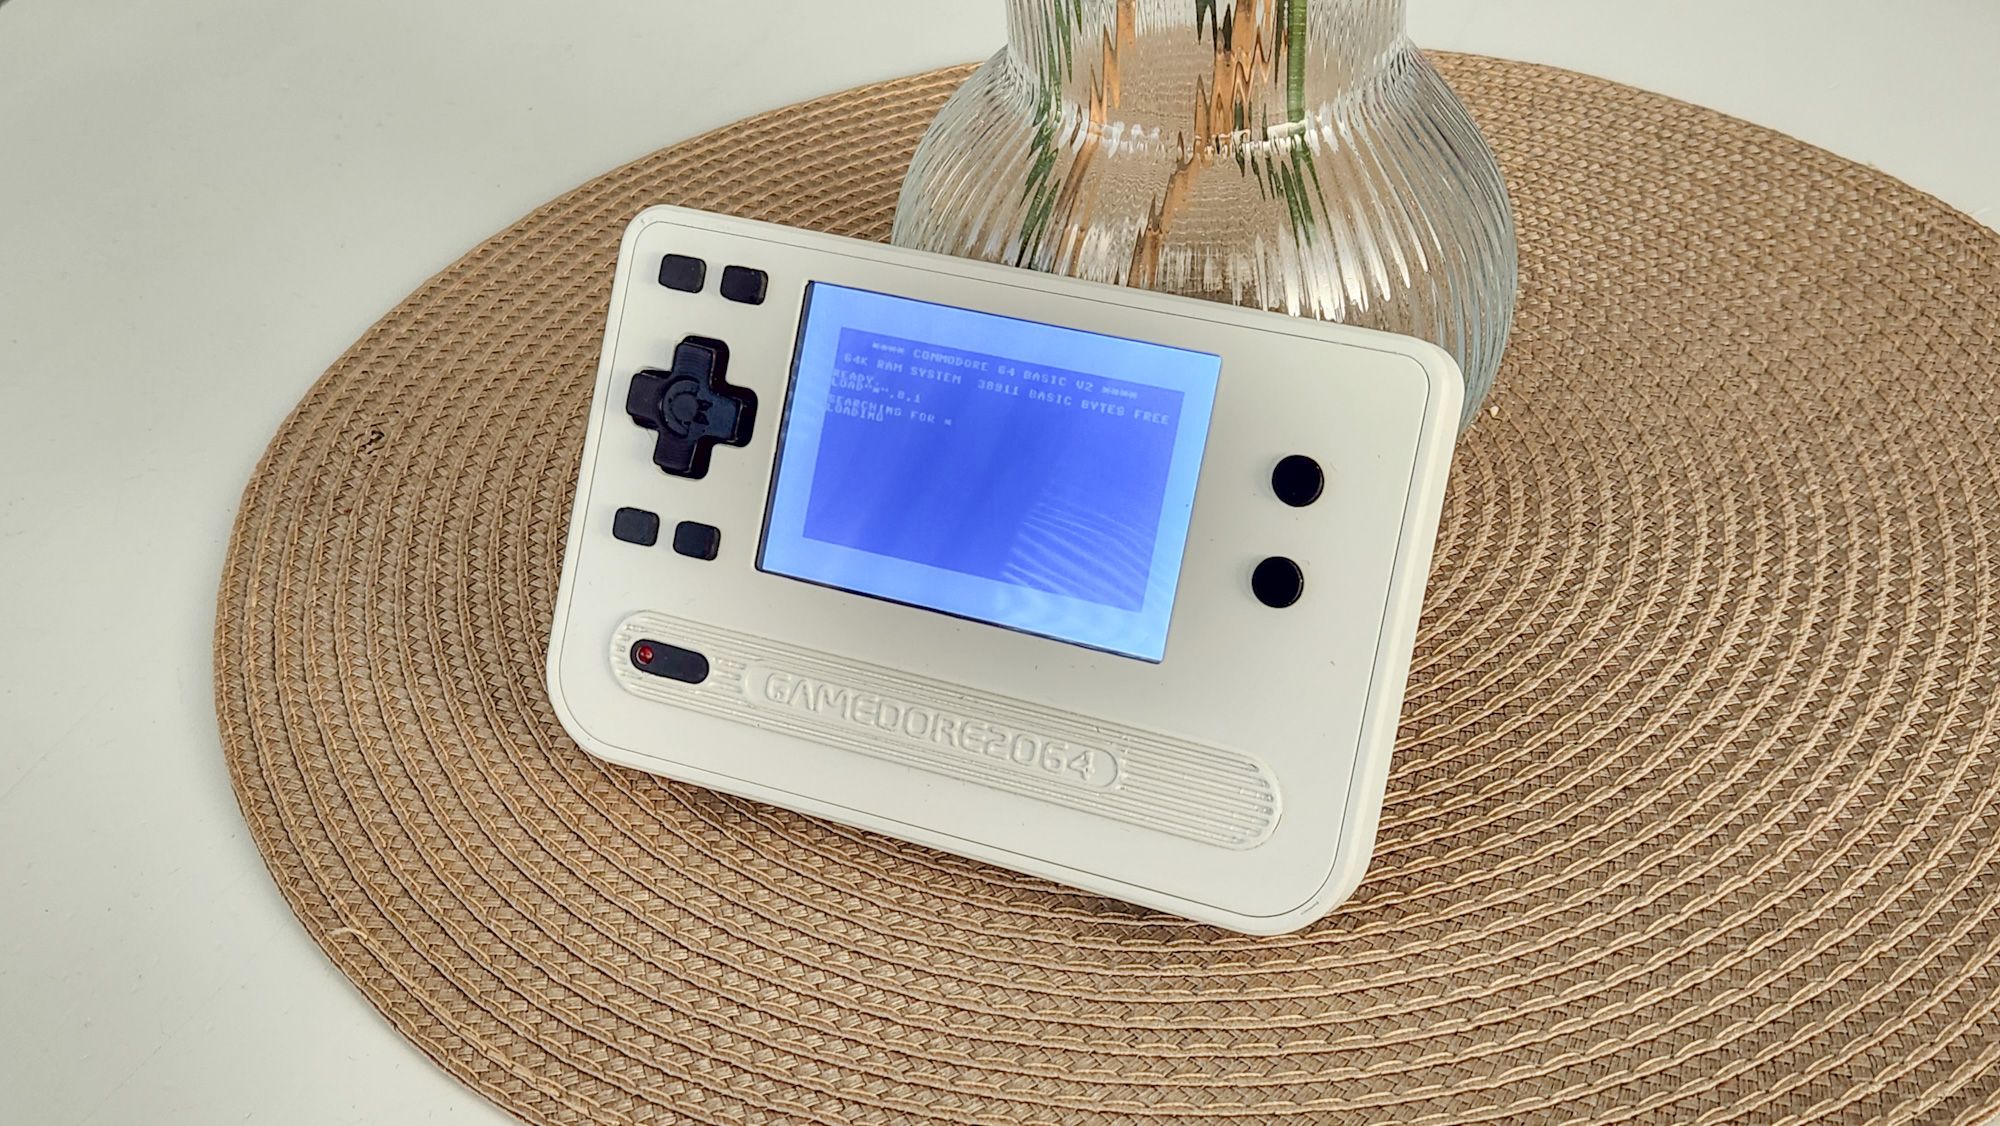
I'm a huge fan of Cyberpunk genre and love to design and build weird Cyberdecks. After building the latest deck, Cyberdore 2064 (posting more info on that later), I had a sudden interest in trying to make a gaming handheld to play Commodore 64 games. Main components I used were Raspberry Pi Zero W for running Vice emulator, Raspberry Pi Pico to handle the controls (D-Pad and buttons), 3.5" RPi Display, 18650 battery shield. This is a short story on how to create the device by yourself.
Timelapse video of design and build of Gamedore 2064 handheld device
Even though I started my love of computers with Commodore VIC 20, the Commodore 64 was the one that really got me hooked on computers and the reason I ended up in the software development career.

TL;DR
- You can find the 3d printable STL files from Printables - please click the like button there so I receive Prucameter points :) Gamedore 2064 by Tommi L. | Download free STL model | Printables.com
- You can find the Circuitpython source code for controller from GitHub: tlaukkanen/rpi-pico-dpad: Simple game controller with Raspberry Pi Pico (github.com)
Bill of Material
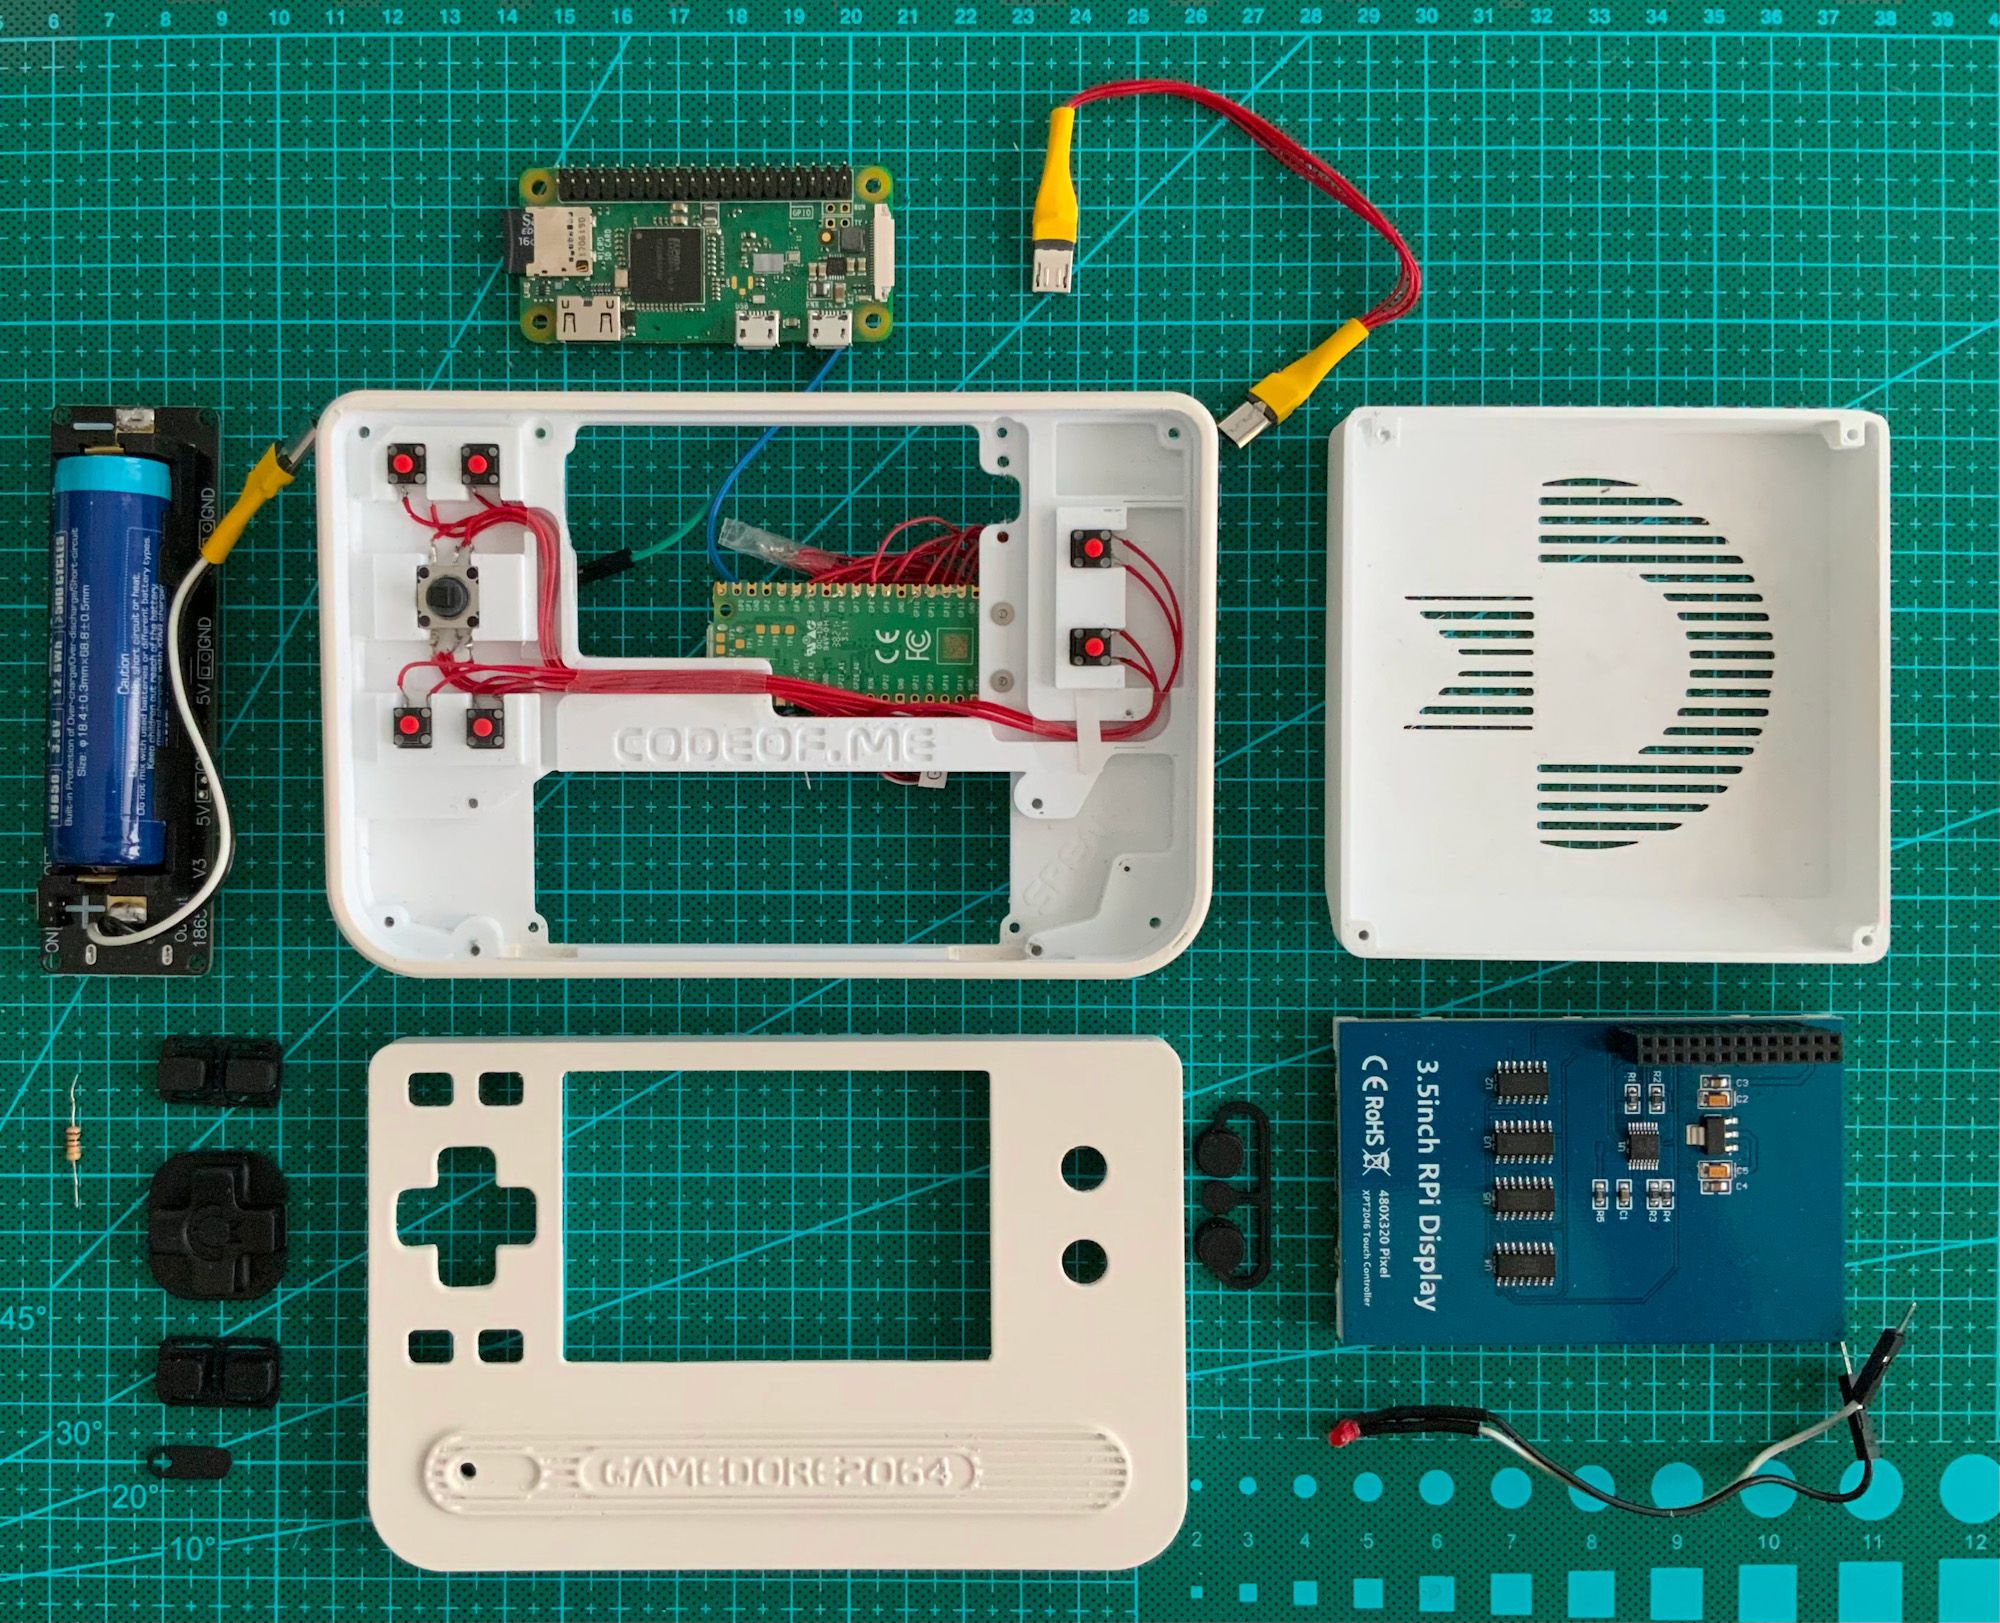
Device is using the following components:
- Raspberry Pi Zero W (I would suggest on using Zero 2 for better performance)
- Raspberry Pi Pico for handling buttons and d-pad
- 3.5" LCD display - Like this from Aliexpress - Quite cheap and looks horrible - and learned later that this is the bottleneck for slow framerates
- 18650 battery shield - Like this from Aliexpress - I unsoldered the USB port from the board so that it fits the case better
- D-Pad component - This one from Aliexpress
- Quiet buttons - 6pce, these from Aliexpress
- Really thin wire for buttons and d-pad so those fit in the case slots
- Red 3mm LED to act as activity indicator in the front panel, you should use some resistor for the LED - I think I used 220 or 1k Ohm for my device.
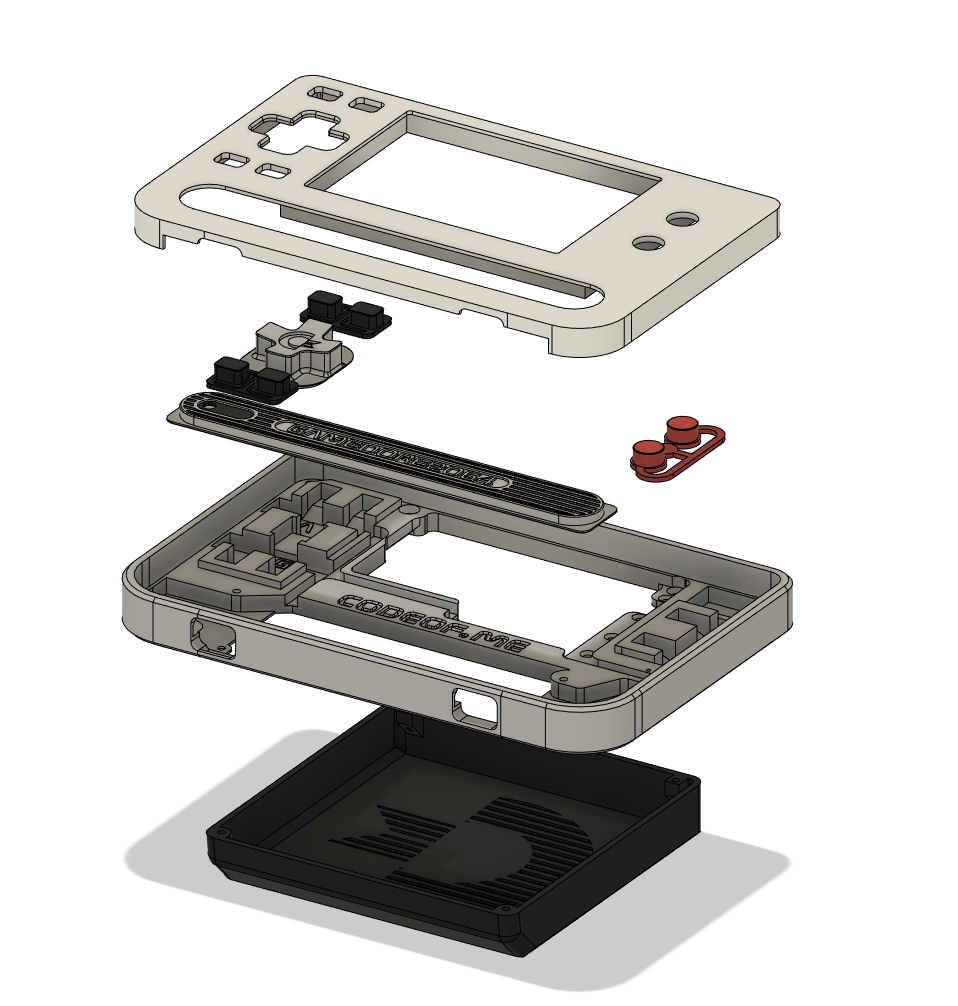
3D Printable Handheld Shell
I designed the shell case with Fusion 360 and made the components to be printable without support. You should be able to print this with a printer that has a print area of minimum 15 x 10 cm. I used my Prusa MINI+ to print out the parts.
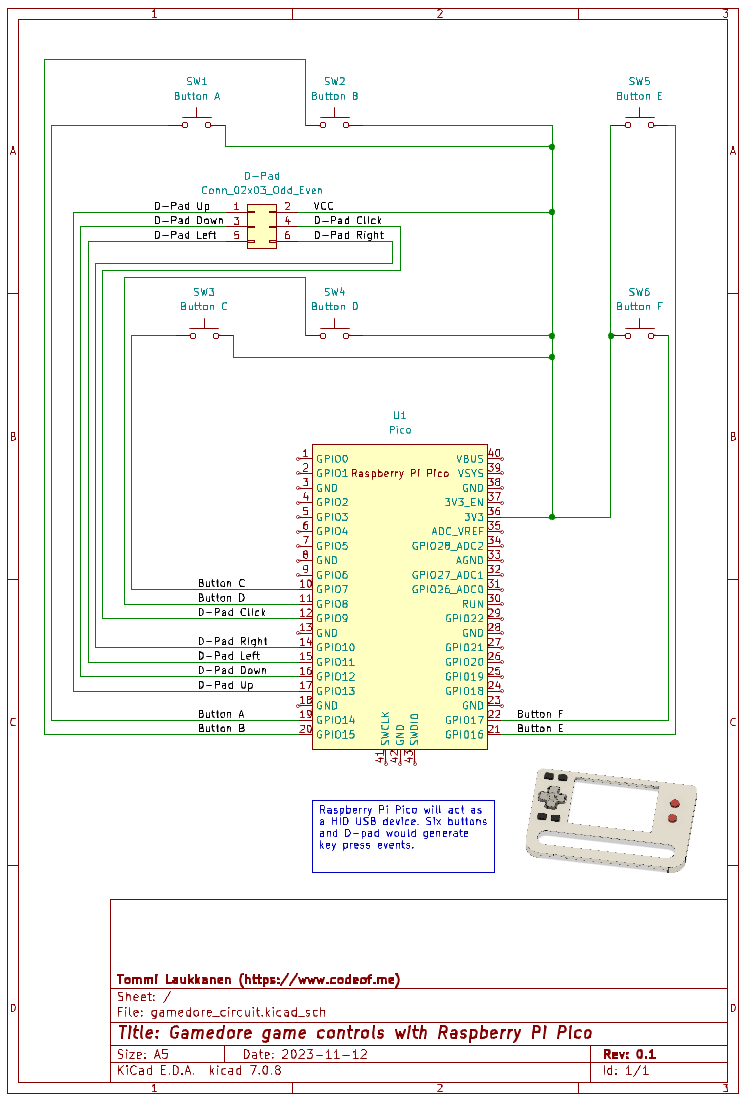
Controls - Hardware
The device uses six buttons and one d-pad for direction controls. The controls are created with Pico which will act as USB HID device when it is connected with USB cable to RPi Zero.
Here are schematics on how the buttons and d-pad can be connected to Pico. I might have used some of the different pins in my setup, so photos don't necessarily match the diagram. You just need to note your pins and configure those accordingly in the Python code later.
Controls - Software
I created the control software using Circuitpython using the adafruit_debouncer, for identifying button presses and adafruit_hid for setting up Pico to act has USB keyboard. Code will interpret button or d-pad clicks to keycodes. You can easily customize those to fit the emulator that you want to use. I used the following as those work quite well with Commodore VICE emulator.
Check out the latest up-to-date code from GitHub:
 tlaukkanen
import board
import usb_hid
import digitalio
import adafruit_debouncer
from adafruit_hid.keycode import Keycode
from adafruit_hid.keyboard import Keyboard

# Button mapping
BTN_A = 3
BTN_B = 1
BTN_C = 0
BTN_D = 7
BTN_E = 5
BTN_F = 2
BTN_DOWN = 4
BTN_LEFT = 6
BTN_RIGHT = 8
BTN_UP = 9
BTN_PRESS = 10

button_pins = [
    digitalio.DigitalInOut(board.GP3),
    digitalio.DigitalInOut(board.GP4),
    digitalio.DigitalInOut(board.GP5),
    digitalio.DigitalInOut(board.GP6),
    digitalio.DigitalInOut(board.GP7),
    digitalio.DigitalInOut(board.GP8),
    digitalio.DigitalInOut(board.GP9),
    digitalio.DigitalInOut(board.GP10),
    digitalio.DigitalInOut(board.GP11),
    digitalio.DigitalInOut(board.GP12),
    digitalio.DigitalInOut(board.GP13)
]

buttons = [None] * 11
for i in range(0, 11):
    button_pins[i].direction = digitalio.Direction.INPUT
    button_pins[i].pull = digitalio.Pull.DOWN
    buttons[i] = adafruit_debouncer.Debouncer(button_pins[i])

keyboard = Keyboard(usb_hid.devices)

def get_key(button):
    if button == BTN_A:
        key = Keycode.F12
    elif button == BTN_B:
        key = Keycode.F1
    elif button == BTN_C:
        key = Keycode.ENTER
    elif button == BTN_D:
        key = Keycode.ONE
    elif button == BTN_E:
        key = Keycode.A
    elif button == BTN_F:
        key = Keycode.SPACEBAR
    elif button == BTN_DOWN:
        key = Keycode.DOWN_ARROW
    elif button == BTN_LEFT:
        key = Keycode.LEFT_ARROW
    elif button == BTN_RIGHT:
        key = Keycode.RIGHT_ARROW
    elif button == BTN_UP:
        key = Keycode.UP_ARROW
    elif button == BTN_PRESS:
        key = Keycode.X
    else:
        key = Keycode.ESCAPE
    return key

while True:
    for i in range(0, 11):
        buttons[i].update()
        if buttons[i].rose:
            key = get_key(i)
            keyboard.press(key)
        if buttons[i].fell:
            key = get_key(i)
            keyboard.release(key)
Emulators
There are multiple emulators to choose from for the RPi Zero. One of the easiest might be RetroPie as you can get full SD card image for that from the official Raspberry image generator. After that you just need to install the drivers for the 3.5" display.
For better performance it's also good to check optimization tutorials on how to enable and use the FBCP-iLi9341 driver with the 3.5" display as that will boost up the FPS significantly:
- RetroPie 3.5 inch SPI display HIGH FPS (FBCP - iLi9341) (youtube.com)
- juj/fbcp-ili9341: A blazing fast display driver for SPI-based LCD displays for Raspberry Pi A, B, 2, 3, 4 and Zero (github.com)
After everything is setup, you are ready to go and enjoy those golden games from the 80s with the gaming device that we never had back in the day :'-)
Add your comments on my Mastodon post:
